Baking diary – log 3 – 28/04/2012
Yesterday, I did a long and pretty informative research about Bánh mì and how we make it originally in Vietnam. Today, as promised, I will describe how I make Bánh mì in my own way, which suitable for home bakers everywhere, who share the same dream of conquering this challenge to successfully recreate the mysterious Bánh mì baguette.

Vietnamese Baguette – Banh Mi
I am a huge fan of Bánh mì and in Finland, at the moment, there is no bread that could come close to my heart and stomach as Bánh mì does; therefore, I have tried to recreate Bánh mì for a very long time, for at least 1 year continuously if I recall correctly, with various techniques and recipes found on the Internet, without any stable successes. Ask for a person who eats Bánh mì for breakfast almost everyday for the last 15 years (the first 5 years, my teeth was growing or so, lol), how can I suppose to suppress my longing for Bánh mì? Help!
“I have to make it!”
“I HAVE TO MAKE IT!”
That thought kept me trying and trying some more. Finally, my effort paid off. Last January when I returned to Vietnam to celebrate 2012 Lunar New Year with my family, I had a chance to be a free apprentice at a Vietnamese bakery nearby. It was such an eye opening experience. All the myths about Bánh mì became clearer. More information about how Bánh mì is originally made in Vietnam, kindly refer to my previous post of the Adventure to the Mysterious Bánh mì land – Episode 1/2.
Thanks to the bakery owner/ baker in chief that I have worked for a short while ago, I have created a Bánh mì recipe that is suitable to be produced successfully at home baking level, where no industrial heavy machine or special ingredients required. This recipe gives the most stable result among all recipes I tried or created (at the very least, to my home oven in Finland). I, however, cannot guarantee 100% success to all of other’s kitchens due to the highly risky nature of home baking, where the baking environment and result cannot be correctly measured and maintained. I hope my post will act as guidance, or as an encouragement to those out there who share the same interest as mine, that Bánh mì is not a mystery.
Below is how I make Bánh mì baguette. (6 loaves, 75g per loaf)
————————————————
Utensils needed

Needed Utensils
- An electric mixer with dough hook attachment (recommended)
- Clean bowls
- A digital scale
- A baguette perforated baking tray (If you don’t have any, follow this to make one yourself)
- A spray bottle
- A double razor slashing lame (make one yourself like in this photo, I made mine that way, too)

Making your own Scoring Lame (source: dianping.com)
————————————————
Ingredients
- 160ml lukewarm water (around 35 degree Celsius)
- 6g fresh yeast
- 230g bread flour
- 20g finely grounded rye flour
- 20g sugar
- 4g salt
- 20g odorless oil such as sunflower or canola (or a mixture of 10g melted butter – 10g oil)
- ½ vitamin C tablet (100mg acid ascorbic per tablet)
————————————————
Instructions
Step 1: Dissolve fresh yeast into the measured warm water (Remember: warm water is needed to activate the yeast, do not use too cool or hot-to-touch water). Let sit for 5 minutes or so until there is bubble on the surface. This is a necessary step to check if your yeast is still alive and active. If the mixture does not bubble up after 5 minutes, discard it, and make a new one, maybe this time with a different yeast source, or pay attention to the water temperature.

Combining Yeast and Water
The fresh yeast is usually packed in form of cubes (or cake as people call it). Here is a picture from the yeast cake I use in Finland, 50 gram per cube, able to leaving 400ml of liquid in dough recipe. You can buy it in almost every market here; it should be in the fridge near to milk products, labeled “Toure hiiva” – Finnish for fresh yeast. 🙂

Fresh yeast in Finland
Personally, fresh yeast is what I am always to use in making my Bánh mì. I have tried making it with different brands of dry yeast without stable success, so I just drop that and stick with fresh yeast. Surprisingly enough, my Bánh mì dough, when being made with fresh yeast, comes out a bit firmer and cohesive than when being made with dry yeast (and Bánh mì or other baking products baked with fresh one has less yeasty smell. It has been claimed that bread baked with fresh yeast have superior flavor, too.) So just some more reasons why I stick with my precious little fresh yeast cubes in my bread baking. However, if fresh yeast is not available, or you are not familiar with it, try sticking with your normal dry yeast because technically, they should react the same way and produce the same result. Here is a table to convert fresh yeast, to dry yeast, to instant yeast:
|
Fresh Yeast |
Dry Yeast |
Instant Yeast |
|
3g |
1.5g |
1g |
|
6g |
3g |
2g |
|
10g |
4g |
3g |
|
12g |
6g |
4g |
|
17g |
7g |
5g |
|
34g |
14g |
10g |
|
68g |
28g |
20g |
(Source: http://www.dovesfarm.co.uk/resources/yeast-and-raising-agents/yeast-conversion-table/)
The math is simple. So for this recipe, if you wish to use dry yeast, use 3g of dry yeast. If you wish to use instant yeast, use 2g of instant yeast. Just make sure that you activate the yeast correctly according the manufacturer instruction. (Normally, it should be 42-degree warm water for dry yeast while instant yeast can be sprinkle directly in the dough mixture.)
Step 2: Mix all the dry ingredients in to a large mixing bowl. I use a combination of bread flour and rye flour (8% of total flour weight) because as I researched and experimented, rye flour does add some advantages to my Bánh mì dough.
– Firstly, a small amount of rye – 5-10% of the total flour by weight – has a definite effect on the flavor of the bread. The distinctive flavor of the rye itself may not be noticed, yet the bread’s overall flavor seems better. This may be due to the action of the amylases in rye releasing more sugars. This is necessary for this bread because originally, Bánh mì has quite plain taste.
– Secondly, Rye contains a group of important complex sugars called “pentose’s. They compete with the proteins that make gluten for water, and water is the substance that leads the proteins to combine to form gluten. This means that dough with rye flour added often require a bit higher proportion of water than pure wheat dough. Therefore, even though this dough is 64% hydration, by adding 20g rye flour, the dough is less sticky and easier to handle. Also, rye added dough requires gentler and, usually, briefer mixing than wheat dough, also another plus.
– Thirdly, rye has more free sugars than wheat, so rye added dough ferments faster than pure wheat dough. You can cut down the fermenting time by adding bit rye flour into the dough.
– Fourthly, this point does not have scientific background though, by adding a small amount of rye flour, I noticed that the bread crust is crispier than pure wheat loaves’. It’s almost like hard flakes, which resembling original Bánh mì’s crust a lot.
If you don’t have rye flour in hand, simply just leave it and add the same amount of bread flour, meaning 250g in total. I used to use only pure bread flour with many successes too. Here are the kinds of flour I use in making Bánh mì.
 and Rye Flour (right)")
Bread Flour (left) and Rye Flour (right)
NOTE: The bread flour I use is semi-coursed 13% protein bread flour (which is normal and usable, because wheat produced in Europe tends to have higher protein percentage than in other regions). The rye flour I use is finely grounded rye flour.
I also add sugar in the recipe to increase the complexity in flavor for this bread since this is not long fermented bread, the flavor can be cut back quite deeply, and have to be support by outside substances. About salt, I use regular table salt, nothing fancy about that.
Step 3: Add oil or oil-melted butter mix into the dry ingredients bowl. Usually, there is no oil in baguette recipe. But please do, in this recipe. Oil will make the crumb moist and soft, resembling original Bánh mì. In Vietnam, bakers use bread improver to increase the moisture in the crumb, but I do not support any kind of addictive added to homemade breads, so I recommend to stick with the oil. A mixture of melted butter and oil can create the buttery smell of the finish products, so, use this mix if you like your bread to smell like a bit more like heaven when it’s being baked and done.

Dry Ingredients and Oil
Step 4: Crust ½ tablet of vitamin C into fine powder and sprinkle into the mixing bowl, together with other ingredients. In France, bread bakers were allowed to use ascorbic acid, in small amounts, in their bread baking, mostly baguettes, tabards, etc. Acid ascorbic creates an acidic environment for the yeast that helps it work better. It also acts as a preservative & deters mold and bacterial growth. With just a touch of ascorbic acid, your breads, the yeast will work longer and faster. By adding this amount of Vitamin C as an improver, my bread dough strength improves significantly; the loaves are also lighter, airier, which make it a lot lot like Bánh mì in Vietnam. However, it gets destroyed during baking, so no health benefits! Here is my Vitamin C bottle.

Vitamin C bottle
I do not recommend using orange/lemon flavor fizzy tablets or Vitamin C candy (even though they contain acid ascorbic), as they do not react the same way as pure acid ascorbic. Vitamin C tablets can easily be found in pharmacy shops and one small bottle of them can be use like forever, so if you want to conquer Bánh mì, the addition of acid ascorbic is a must.
Step 5: After your water-yeast mixture has bubbled up, add it in to the dry-oil-vitamin C mixture in the same mixing bowl.
Step 6: Start combining all your ingredients first by starting the mixer at low speed until you achieve a mass like this. If your mass looks wetter, simply add more flour at 10g each addition. If you mass look dryer, simply add more water at 5g each addition. This can happen due to different flour type that you use, or because of the environment differences such as humidity.

Dough mass
Use the dough hook if you have a stand mixer like me. Some hand mixers also have a duo of dough hooks, which can also be used. Or if you make bread by hand, just create a well in the center of the mixing bowl, add water gradually when using your hand to in a circular motion to help the flour absorb the water, until you achieve a mass like above.
Step 7: increase the speed to medium high speed if using electric mixers. Stop at 5 minutes interval to check the level of gluten development in the dough (a.k.a the strength of the dough). Here is my dough at medium gluten development level after 7 minutes of mixing.

Medium Gluten Development
Here is my dough at 13 minutes of mixing, fully developed gluten. You can see that my dough can be stretched out in to very thin, almost see-through sheet. Stop when your dough reaches this stage.

Full Gluten Development
If you are mixing by hand, fear not. Simply follow this slap and fold (or French method) technique demonstrated in this video by Sourdough Companion.
You can achieve the same result by applying this technique for 25 to 30 minutes. I must say it is not an easy exercise but many of you may not know, kneading and mixing dough by hand is claimed to be the cheapest and one of the most effective stress relieving therapies in the world. Just imagine the dough as the face of someone or something that bothers your right now, and BAM! BAM! BAM! … Phew, good for you. You know what I mean, ahaha. Believe me, very effective. Been there, done that!
Step 8: Shape your dough into a ball and let it rest in a lightly oil container for 1 hour or until double in size. This is the bulk fermentation stage, which let the dough rest for further gluten and flavor development. My apartment is always a bit cold, around 20-22 degree Celsius inside, so my solution is that I cover my container with a warm damp towel, put it inside my oven, which light turned on but no heat applied, like this.

My bulk fermentation set-up
The dough before bulk fermentation

Dough before Bulk Fermentation
And after. Now you may have an idea about double in size.

Dough after 1 hour of Bulk Fermentation
Step 9: After the 1 hour bulk fermentation. Flip the dough out onto your working surface, which already oiled lightly also. It should come out very easily since the containing bowl was oiled. It will deflate a bit and that’s alright.
Step 10: divide the dough into 6 equal parts, 75g each. Then gently shape them into short cylinders, like this. The them bench rest for 10 minutes, covered with plastic wrap, like this.

Divide and Bench rest the dough cylinders
Step 11: After 10 minutes rest; turn 1 ball on to the lightly oiled surface. (As I explain the previous post here, Bánh mì baguette shaped on a lightly oiled working bench, not by using excess flour). Stretch it into very thin sheet, like this. But not too thin that makes it tear apart. Pay attention to the edge of the dough sheet because it tends to be thicker than the inner part, keep the edge very thin. (Otherwise, you will end up with a bone-like shaped baguette)

Roll the dough out to very thin sheet
Roll the sheet very very tightly into a firm torpedo. You should feel the tightness of the torpedo, or else, it will not spring properly when baked. Continue with the remaining balls. When finished, you have a tray like this.

Shaped Banh Mi
Step 12: Mist the loaves with a spraying bottle a couple of time to create the needed humidity for the proofing. Let the tray go through the final proofing stage in a homemade proof box like this, in room temperature, for 1 more hour. Basically, it’s a big size black plastic bag I found somewhere in my apartment, clean thoroughly and let dry.

Homemade Proofing box
After 45 minutes of final fermentation, preheat your oven to it’s maximum temperature, in my case is 300 degree Celsius.
After 1 hour of final fermentation, your dough should reach this volume shown this the picture.
")
Banh Mi – Fully proofed (second rise)
How to know that your loaves have proofed properly? Try the finger poke test. After a while proofing, the finger-poke test behaves as below:
– Hole stays entirely dented in: over-proofed (maybe recoverable by baking right away, maybe not recoverable and reshaping is required)
– Hole dent slowly pops halfway back out and leave a mark of dent: proofing is just right
– Hole pops back without any mark of dent: under-proofed, need more time.
Step 13: At this stage, your oven should be preheated properly to 300 degree Celsius. Your loaves have been proofed to the right stage. You have to make sure that your loaves have a smooth, not totally dried-out but not wet surface. If they are still wet outside, or stick to your finger, you should consider leaving it out in room environment for like 5 minutes to create a “skin” to your baguette.
Now it’s time for some slashing. I used to have countless troubles with slashing my baguettes. But after viewing these wonderful videos and posts, I open up my eyes.
– Proper scoring/ slashing the baguette by Bread Hitz
– By King Arthur Flour
– By Mitch Stamm
– This post by Wild Yeast
http://www.wildyeastblog.com/2009/09/29/score-baguettes/
– This scoring tutorial by The Fresh Loaf
http://www.thefreshloaf.com/node/10121/bread-scoring-tutorial-updated-122009
Here is how I perform my slashing:
– Stand vertically from the loaf, not horizontally; you are facing the loaf length-wise not height-wise.
– Hold the lame like holding a key to open a door.
– The lame should be hold not perpendicularly with the loaf but at a slight angles of about 30 – 45 degree. The cuts should not enter deeply into the loaf, but rather making a lift right under
– Slashing motion is done with the entire arm, not just the hand.
– Imagine dividing the dough into 3 equal strips length-wise. Your cuts should all fall into the center trips but not across the whole loaf.
– Your cuts should be around 0.8cm deep, 5 cm long, with around 1.5cm overlapping with the previous cut.
– After cutting the loaf, I pipe a small line of shortening/margarine into the cut. When baking, the shortening or margarine melts leave the inner part of the cut moister and more fragile than the outer crust, therefore, if the loaves spring while baking, it will choice the weakest point to rise up, which is the moistest part of the loaves.
Here is a picture of how my lashes look like.

Slashing Banh Mi
These following steps are critical in the making of Bánh mì. So read the instruction first, and then follow them exactly.
Step 14: Prepare your oven properly now. Check carefully if there is any air vents in the oven, if there is, cover the exit tightly with a cool damp towel. Mine have one but I did not notice for such a long time, so you’d better check, for the best.
Prepare 200ml of hot water. Boiling is best.
Step 15: Right after slashing your Bánh mì loaves, mist them generously with water from spray bottle.
Step 16: Open the oven’s door, splash the prepared hot water onto the oven floor, and put your prepared baguette tray onto the center rack, close the door immediately. This is how I create steam for my oven.
There are more ways to create steam for your oven. Check these out:
– The Fresh Loaf basic steaming lesson
http://www.thefreshloaf.com/lessons/tentips_1_steam
– Sylvia’s brilliant Towel steaming system
http://www.thefreshloaf.com/node/20162/oven-steaming-my-new-favorite-way
– SteveB of Bread Cetera’s
http://www.breadcetera.com/?p=85#more-85
Feel free to explore all the possibilities. But whatever techniques you use, please remember, steam is fatally important for crispy crust bread baking like baguettes.
Step 17: Turn down the heat to 275 degree Celsius. Bake with steam for the first 7 minutes.
Wondering why steam is so important? Wondering how professional bakers get those beautifully loaves a bread with glossy, crispy brown crusts? One of their secrets is steam.
In the first few minutes of baking, loaves of bread will rise rapidly as the gases trapped inside expand and the yeast has a final burst of activity / oven spring. Steaming within this time helps keep the crust soft. This allows the bread to continue expanding freely.
The steam that has settled on the surface of the bread also dissolves sugars in the dough. As the bread stops expanding and the steam begin to evaporate, the sugars are left behind to caramelize and create a glossy crust.
However, steaming is really only useful during the first 5-10 minutes of baking while the yeast is still active and the internal structure hasn’t set. After this time, the crust needs its own time to set, dry out, and harden up. That’s what you need to do next.
Step 18: Open your oven’s air vent (that previously covered by a damp towel), ajar your oven door for 1 minute by a wooden spoon to let the steam evaporate completely. Then close the door, reduce the heat to 250 degree Celsius and bake for 8 more minutes.
Turn your tray inside out if needed for even browning. If your baguettes brown too quickly or too slowly, simply adjust the baking time or the heat accordingly.
Step 19: Turn off the heat, ajar the oven door, and let the tray sit in the oven for 2 more minutes. Then take them out and let cool off for 5 to 10 minutes.
Here is picture of my finish products.

Freshly-baked Vietnamese Baguette – Banh Mi
Here is the close up of my slashes. I always sit right next to my oven to watch these gorgeous open up. 🙂
")
Vietnamese Baguette – Banh Mi (close-up lashes)
Step 20: Enjoy. You can see in this picture below that the bread has almost little white moist crumb. Perfect for adding layers of your favorite fillings in and eat them up. Nom Nom… 🙂

Vietnamese Baguette – Banh Mi (Crumb)
———————————————–
Wow, this is officially a super long post. On Word, it is now 8 pages full of letters only. If only I can write my bachelor thesis with this speed, then my 50-page thesis will be done in less than A WEEK!
ROTFL.
Well, that’s my little secret prayer every night. 🙂
3 years ago when I first arrive in Finland, I would never thought this time of graduation could come so fast. 3 whole years flashed by like a second in time.
People come.
People go.
Only memories in my heart stay.
Good evening.
Rose,
Updated: I just submitted this post to YeastSpotting, a weekly showcase of yeasted baked goods and dishes with bread as a main ingredient. Here is the link to this wonderful page.

Dear Rose,
Thank you so much for sharing the recipe. I have been craving to have bahn mi here back in my town, where there is none here. I tried it couple times when i was in Sydey.
And so far I have tried so many recipe online, but none of them give that authentic crush of bahn mi. Some are crusty while they’re hot, some can even break my teeth. I am so excited to try your recipe today. But just a couple question, what if i am using instant yeast, do i still need to let it bubble? Coz i notice on the final proofing my bread didnt rise so much and when I score it the skin become wrinkle and they just drop in size. Is it the yeast stop working? And with the Vitamin C is there a roughly gram to measure for the recipe, i think mine might be a lil smaller tablet.
Also is it gonna coz a huge impact for the crust as my oven just could not reach 300 celcius? 😦 can only about 230 celsius.
Thank you once again.
I really cant wait to have that original bahn mi at home
Irina
LikeLike
Dear Irina,
My sincere apologies for missing your comment, I was away for a long long time. Please find my answers to your concerns as below:
– If you use instant yeast, just make sure to measure it correctly according to the conversion table provided in the post. You don’t have to wait for it to bubble.
– If your dough did not rise much, check the quality/aliveness of the yeast in general. If it drops in size when you score, you have overproofed the dough, unfortunately, I suggest you cut back proofing time about 10 minutes in your next attempt. When you press the proofed dough, the dough should lightly spring back but leave a visible (but small) dent on it.
– Unfortunately, the vitamin C is too small in this recipe… the one I used is 1000mg of acid ascorbic /tablet, I think you can adjust accordingly based on this.
Hope this help and let me know how it turns out.
Sorry again for my (really) late reply.
Rose.
LikeLike
Dear Rose,
Only 1 word “AMAZING”. You did not only spend time cooking, writing, sharing but also did many researches on little things that could affect the outcome of the breads and then provided us with all useful links. I will try the recipe tomorrow. Can I double the ingredients if I want to make more than 6 breads? Do u suggest to reduce the amount of Yeast since there’s more flour? Thank you very much for posting this.
T.P.
LikeLike
Hi Tram,
Thank you very much for your kind words, I very much appreciate them. And sorry your comment has been buried till now.
Feel free to double the bread recipe as I used the metric measurement (aka gram) instead of volume, so the recipe would live up precisely to the original baker percentage.
I hope this comment reach you not too late (or maybe it already did, sorry again). Let me know how your Banh Mi turned out, can’t wait to hear more.
Rose.
LikeLike
Pingback: Rice Rolls | "blackberry-eating in late September"
i read this 2 parts article and I’m felling very inspired! Thanks for the post. Quick question- can I substitute bread flour with reg unbleached flour ?
LikeLike
Hi Hoa,
Thanks for your kind words, from the start, the purpose of this blog is definitely to inspire.
To your question, technically, the answer is no, because all purpose flour and bread flour has different gluten percentage, which will greatly affect the final bread product. For the best result, I think it is worth buying some bread flour as indicated in the recipe.
Hope it helps and keep me updated,
Rose.
LikeLike
Hi Rose, I love banh mi and I always crave for it. I live where there is only one shop that sells poor loaves of banh mi. I was trying to make it myself, too. Sometimes it came out perfectly, sometimes not. I need to take time to read yours. I am feeling lack of passion these days. I need a cure first. Thanks for replying my email.
LikeLike
Hi cô Du,
Practice makes perfect, I have had rainy days in my kitchen too. But let’s not give up on what we truly want. Determination can be a great inspiration to me, most of the time.
I wish you well,
Rose.
LikeLike
Pingback: Bánh mì nóng giònnn | Nhàn Trần
Chị mới làm 1 mẻ bánh mì, rất tuyệt. Cám ơn em nhé,
LikeLike
E nhin hinh chi rach banh ma me ly luon. 🙂 Dao nay chi khoe khong a?
LikeLike
Cám ơn em chị vẫn khoẻ. Lần đầu rạch hơi run tay bánh mì chưa đẹp, giờ thì chỉ xẹt 1 phát là xong . Chúc em cuối tuần vui nhé.
LikeLike
Rose–it’s been almost 2 years since last I posted, but I wanted you to know I found a great new Banh Mi recipe from another vietnamese baker that works great! It’s very simple and really turned out well–great shape, shattering crust, fluffy interior.
Check it out here:
http://danangcuisine.com/banh-mi/recipe-86-banh-mi-vietnamese-baguette/
She includes a great YouTube video with a clear demo of her shaping method, which involves some slapping. Good luck!
Photos of mine today (the interior one was a loaf that got a little smushed after slicing and tearing). I did (5) 6″ loaves–next time I’ll probably do 8″ loaves and cut off the ends to square them off. Maybe do an overnight fridge rise, too, to add more flavor.
http://imageshack.com/a/img199/1869/hfk4.jpg
http://imageshack.com/a/img855/159/8awn.jpg
LikeLike
Thanks Mark, for being so passionate in Banh Mi, and for keeping contact with me all this time.
I will definitely try out this recipe. It looks great! I will keep you posted.
Thanks again. I hope all is well.
Rose,
LikeLike
Pingback: The Adventure to the Mysterious Bánh mì land – episode 1/2 | Faraway from Home
Hi Rose,
Its good to know u & read wat u write about Banh Mi on your blog. I really appriciate wat u done here. Wat a great job!
Are u still making Banh Mi ? Its been almost 1 year since u had your last comment on this thread.
I´ve done trying your method twice n still failed. But dont get me wrong because the way I did it was not right. I will try more n more in order to master the art of Banh Mi Zòn, just like wat u got 😉
Have a nice wk!
Manh Nguyen
LikeLike
Hi Manh,
I still making my own Banh Mi regularly, but not as often as when I was in Finland. 🙂 I hope you give yourself and Banh Mi more time to master it. I know you can do it.
Lots of luck in the kitchen,
Rose,
LikeLike
Good Gracious….looking at those lovely “ears” makes me want to bake this Right Now! I’ve heard making french baguette isn’t for beginners so I’m a bit shy away from trying this bread recipe. But, seeing how lovely your breads are and well-written instructions, I think I must try soon!! Thanks for posting this!
LikeLike
Hi Adelina,
How is it going with your bread baking. Hope to hear from your kitchen soon.
Rose,
LikeLike
Hi Rose, I am not having any luck with the shaping, as well as my baguettes couldn’t develop the ears!!! I tried to create steam in the oven, but it doesn’t seem to help much! I baked about a dozen loaves but only one time I was able to get half the loaf with ears developed! Not sure how or what needs to be fixed. Argh!!!
LikeLike
Hi Andelina, just hang in there and practice more and more, I can tell you gonna get there soon. The secret to baguette’s ear is to create a very evenly tight loaf skin. In my way of shaping baguette, I had described this process by flattening out the dough very thin then firmly rolling it in to a “tight” tube, u can tell you do this right by feeling the tight skin of the dough in your hand. If u managed to get half an ear, that means that half of the loaf was tighter.
Also, pay attention to your scoring, it greatly affect the ear. For a good looking baguette, practice and then practice some more. I am no genius as well, it took me about 2 dozens to get my first ears, then 2 dozens more to make it happen constantly. My, it was a baguette flood in my home that time. So u r doing well!
Also, I want to ask h what abt the flavor and texture?
Rose,
LikeLike
Hi Rose, Thanks so much for your response and feedbacks!!
Ok, so I tried again last week. I purposely asked for a PTO day just so I can have the day to myself to figure out what’s going on with my baguette baking skills. I did as you suggested with making sure the rolls are tight, and it wasn’t a success for me. I do like the flavor. For ones that I really tried to roll them into a “tight” torbedo, the crumbs are less open and more dense. Also, my oven temperature does not go up to 300 C. Its highest setting is at 550F, which is about 288C. I am purchasing another bread lame. It’s been difficult locating a double edge razor blade around here for some reasons!! I was exhausted, but I guess I shouldn’t give up too easily. My hubby told me if it tastes good, it’s a good baguette. But it looks horrible to me. Btw, how do you store baguette?
Thanks again for your encouragement and feedbacks!!!
LikeLike
Hi Adelina,
You are progressing, so keep up with good work! The taste is great, that’s still my selling point of the recipe. 😉
I usually store baguette or bread in general in a sealed paper bag to keep it from staling. To make the crust crispy again next morning, I have this little trick: turn on the oven to 200 degree C, spray the loaf quite heavily with water, then bake again for about 5-10 mins, it will be like freshly baked.
Keep me updated,
Rose,
LikeLike
Dear Rose —
Thank you so much for perfecting a bánh mì recipe and making it available to baking newbies and home cooks such as myself. I’ve been living in Vietnam for the last 2 years and while there are a lot of dishes I love here but if forced to choose 2 favorite meals, it’d have to be bánh mì and bún chả which I’d happily consume 3 times a day (and have often). Although I miss home desperately and look forward to repatriating to the U.S., life would hardly be worth the effort if I am to be condemned to *life sans bánh mì*. You are a lifesaver. Really. 🙂
I may bother you again once I’m resettled and have an oven again. But before signing off I have a question about the “Western-style” breads I’ve run across in Vietnam. I’m struck by something you mentioned in the previous post about the unstable low-protein flours used by bakers in Vietnam. Can you tell me if that is the reason why so much of the “Western-style” breads I’ve come across here are so soft and lack “bite” ? I have not been able to figure out what accounts for this. Is it Vietnamese taste preference, or the flour(s) available or the technique?
Many thanks in advance,
TQ
LikeLike
Hi TQ,
Thank you for your kind words, I am very much appreciated. This Banh mi recipe is the most stable one in my oven, I hope it will be yours too, soon. Cannot wait to hear more from you.:D
As for the western-style breads matter, I think it concerns all the three factors that you mentioned. First, we Vietnamese with all the Chinese cultural exchanges, are widely fond of soft, fluffy breads, rather than full-bite, dense bread (fact: the first big bakery in Vietnam, Duc Phat, is Chinese-Western-oriented. Secondly, as for my opinion after researching and re-baking many recipes, I feel that the result is not as aromatic, and high-quality as I used to produce in Finland :(, which I suspected due to the lower protein, lower quality flour, but insanely more expensive here. Last but not least, the techniques they are using also add up to the bread softness. I have never seen one bakery no using commercial stabilizers in their bread, which makes the bread rise higher, increasing the volume, and therefore, softer. They might use other techniques, such as tangzhong, find out more about it here, if you are interested: https://simplyafoodblog.wordpress.com/2012/11/05/revealing-the-ultimate-secret-to-softer-fluffier-bread-that-stays-fresh-for-days-part-1-my-universal-tangzhong-converting-formula/
Oops, sorry for the long reply, my bad. 🙂 I hope it answers your question somehow. Many luck in the kitchen, and let’s keep in touch.
Rose,
LikeLike
For shiny outside crust, I tried using a mixture of water and 1 egg white. It was in a KAF recipe for making crusty European rolls.
LikeLike
Thank you, Jo. I will definitely try your advice. 🙂 Have a very nice day.
LikeLike
Pingback: Leserwunsch: Bánh mì (Vietnamesisches Baguette) – Plötzblog – Rezepte rund ums Backen von Brot, Brötchen, Kuchen & Co.
Thank you for reading my post. Hope it helped somehow. 🙂
LikeLike
Hi Rose,
I am a huge fan of Vietnamese baguette. I recently started baking and have grown a passion for it. I have made several attempts baking the baguette using several online recipes prior to reading your post. The outcome is not what I had expected. Thanks so much for your detailed recipe. Now, I can pretty much pinpoint what I did wrong. I have several questions to ask you before using your recipe. Is there a substitute for rye flour? Would wheat gluten have similar result.
LikeLike
Hi Zoe, thank you very much for your kind words. I also hope my recipe will somehow help you conquer your challenge. About your question, the answer is yes, you can substitute rye flour with wholewheat, or even normal bread flour. If you read further in the post, you can see my explanation for using rye flour. Of course using different ingredients may cause the final outcome to alter, but in this case, rye is only 5% of the recipe, so I don’t see a huge problem with that. 🙂
Plz don’t hesitate to ask more question if you need to, and keep me updated with your kitchen. 😉
Rose,
LikeLike
Another incredibly informative post! I appreciate all the details and tips you provided, Rose. I have recently fallen in love with baking bread and I’m eager to try my hand at these Bahn mi and traditional French baguettes, too!
LikeLike
Hi Korena, thank you for your constant support and encouragement. 🙂 I cannot believe you just start baking, because your breads look amazingly delicious, especially the challah and the cracked rolls.
I wish you many luck with Banh Mi and hope to hear feedback or recommendation from your oven soon.
Rose,
LikeLike
I am so happy that you’ve posted this recipe! There is no bread within 600 km that approaches Banh Mi. I loved these loaves when I lived in California, and sometimes my heart aches with longing for those perfect sandwiches! I’ve looked all over the internet for a good recipe and the few I’ve seen are much too vague for an absolute novice like me. I tried a few with rice flour and one no-knead dough with not much luck.
I am such a bad baker that it will still take me all summer to perfect your techniques, but for the first time I feel that I will understand what went wrong and how to correct it. Don’t ever feel bad about writing too thoroughly – there’s no such thing. You’ve saved me from having to call Vietnamese bakeries in Atlanta and Philadelphia and asking if they would ship fresh rolls on a monthly basis, lol.
Many blessings to you and yours, and wish me luck!
Shannon
LikeLike
Hi Shannon,
Thank you for your very kind words. I really appreciate that. 🙂
I wish you many luck in conquering this Banh Mi challenge. If you have problems, or question, please don’t be hesitate to ask. I will try my best to be helpful. I am just another novice baker myself, and it took me almost 1 year to recreate this recipe. But with courage and practices, I believe that you and I will get there. 🙂
Rose,
LikeLike
Pingback: Weekend Cooking Challenge – Vietnamese Chicken Curry – A New Love – Adobe Photoshop Lightroom 4 | Faraway from Home
Pingback: Bánh mì nóng giòn là lá la. | Nhàn Trần
Bây giờ là 11h30 tối chị vừa nướng xong mẻ bánh mì theo công thức của em. Rất là ngoooon. Cám ơn em nhiều, chị sẽ post bài cho em coi nhé. Bây giờ thì đi ngủ đây, mai phải đi làm. Có lướt qua thấy giài thưởng chi chi đó nhưng chưa đọc kỹ mai hãy tính em nhé. Bye bye
LikeLike
Hihi,
Banh Mi ngon ha chi. E mung qua. 🙂 Mai chi post hinh e xem voi nha.
Ngu ngon chi,
e Nhung
LikeLike
Mời em xem Bánh Mì chị làm nhé. Cám ơn em nhiều lắm.
http://thanhnhan2309.wordpress.com/2012/05/17/banh-mi-nong-gion-la-la-la/
LikeLike
Hey Mark,
I just try Peter’s suggestion about lowering the baking temperature. I baked this batch yesterday at 220 degree C for 20 mins. first 10 with steam, then 5 more with door ajar, lastly 5 more closed. I also reduced the oil to 15g, increased water to 170g. Others were used at the same amount as in the recipe.
Here is the result. The loaves were shaped at 76g each. After baked measured at 23cm long:
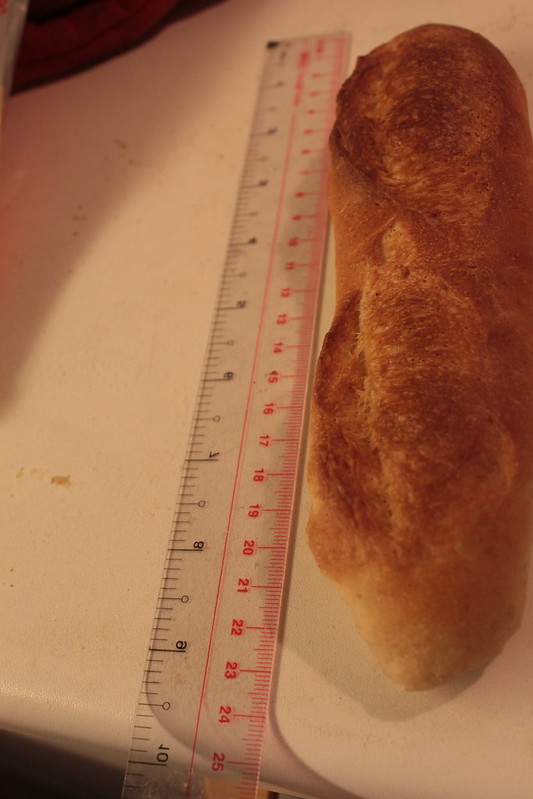

And 4cm thick:
I did not really see any real differences in the volume of those loaves, maybe my shaping is a bit weak on these loaves (I let my friend shaped them, actually) But the crust was harder and crustier, thanks to longer baking time. I will try again.
How about yours?
And have a nice weekend.
Rose,
LikeLike
Hey, Rose:
They look great–your slashes are very nice!
I tried a batch yesterday and, no, I didn’t see much difference using Peter’s advice either except in the crispiness of the crust due to extended baking times.
Here is my current approach, based on your notes and my experiments:
http://bit.ly/Kxhtbc
As an experiment, I tried 3 types of coatings: 2 with plain water, 2 with vinegar/water, and 2 with cornstarch/water. Afterwards, I could not see any visible difference, but haven’t had a chance to cut and eat them yet–we were going out and I threw them in the freezer after cooling.
My height is stabilizing at about 5.7cm/2.25″, so it looks like I’m getting about 50% more height than the one in your photo. It did take about 3 hours(!) to rise that high, just sitting covered at room temp. There was little oven spring, so maybe I am overproofing, but I’m letting them rise until a dent starts to hold when poked and they are not collapsing…so I’m happy! 🙂
I probably won’t bake again until Monday–have a great weekend and good luck!
-Mark-
LikeLike
Rose:
I just got some really interesting suggestions directly from Peter Reinhart (if you don’t know him, he’s a renowned baker and baking instructor with books that are considered reference works).
One important point–I told him I was baking at 450°F/230°C and he thinks that’s too high, even though it’s much lower than where you and I started. That’s interesting, because even his french bread bakes at 450°F in his book, “The Bread Baker’s Apprentice”. I’ll take his word for it, though–he’s the expert!–and it makes sense to dry it out more to get a flakier crust.
His comments:
“As for flaky crust, do you want it to be shiny or can it be dull? If dull, try brushing the surface with a water/rice flour mixture or use cornstarch — same function. It should be mostly water, not a paste, just to add some wet starch to the surface. OR, you can brush the top with a white vinegar and water solution (about 50-50) instead of the starch wter.
It may take a few test batches to decide but the fact is, if you use oil in the dough to soften it it will be harder to get a crispy, flaky crust unless you get maximum rise.
Also, be sure to open the door at least once or twice during the second half of the bake, and perhaps for the final 3 to 5 minutes of the bake in order to drive out all moisture from the oven. Even just propping it open with a towel is enough to let out the steam and moisture.
Also, lower the oven temp. to 375 degrees after the first 3 minutes of baking to extend the bake time and drive off more moisture to preserve the crust. I think you’re baking too high and thus too short a time to preserve the crackle — the bread is browning too quickly. When you have sugar in a dough you need to bake lower than for French bread.
Lots of ways to tweak this but you have to start somewhere. Within three batches you should have it figured out.”
LikeLike
Hi Mark,
Thank you for your information. I do know Peter, well, of course not like face-to-face contact, but I also adore his work. 🙂
I will try his suggestion about lowering the temperature 1st thing tomorrow morning. And let you know how it turns out.
Rose,
LikeLike
This is a recipe I must try! Great post!
LikeLike
Hi Mamagottabake,
I hope to hear more from your oven.
Rose,
LikeLike
Pingback: Croissants ans Everything Laminated – Part 2 – My Croissant Chronicle, How it all began… – Lessons and Tips learned | Faraway from Home
(I’m reposting down here since it’s getting so narrow above; you can delete my first post from today.)
Hey, Rose:
Today’s long update–it’s amazing the progress you can make with determination (and some help!)!
Yesterday’s came out great–the outside is almost there and I finally have the height and shape I want:
http://imageshack.us/photo/my-images/442/photo2oh.jpg/
http://imageshack.us/photo/my-images/713/photo1ekb.jpg/
These came out really large and fluffy–about 5.7cm/2.25″ high and 6.5cm/2.5″ wide–very soft inside and with a nice crust. This is the size I’ve been going for.
I started by thinking about the egullet.com article about proving that you provided. During the final proof I took one of the 6 shaped loaves and set it aside under a clear container that let me measure the rise until I could see it was at 2x. This took almost 2.5 hrs., which was long but turned out to be correct. I was methodical about poking the loaves to ensure they were still rising and baked them as soon as I saw the indent start to stay.
I lowered my overall temps to 450°F/230°C for the whole bake (after preheating at 500°F/260°C). I used 20 seconds of steam and kept them covered for 7 minutes at the beginning before uncovering for the final 10 minutes of baking.
The other big insight was mixing and rising–I used the food processor again for about 4.5 minutes, stopping when the dough started to fling to the sides and a strong windowpane was developed. I let it rise until doubled, about 45 minutes, and then did something from an earlier experiment–punching down and then gently folding and stretching:
I then let them rise back to the 2x level and then divided and shaped into rounds, then getting a really tight exterior when shaping first into batards, 10 minute rest, and then into baguettes by folding (letter style–shape into rectangle, bottom third up, top third over, seal) rather than the “cinnamon roll” method, and trying not to de-gas too much:
I also corresponded with the author/baker Peter Reinhart–he thought the recipe percentages looked solid. He suggested mixing the dough longer, in general, to develop a stronger structure and letting it rise very high, even if it takes longer. I think the trick is to let it rise 2x without overproofing, as you suggested; it really needs to get big before it goes in, as oven spring only does so much. If the outside is tight, it’ll rise quite high without collapsing.
I know this is a lot of detail to ingest, but I had to share with someone! 🙂
Regards,
-Mark-
LikeLike
Hi Mark,
Your improvements so far has been very visible. I am amazed. 🙂 I think other shaping methods may have better result to your loaves than mine (here I mean both my way and my loaves).
I have also tried a lot of shaping way before, but maybe, because I did not perform it super precisely, they didn’t turn out very well. The shaping method I described and are using is the most alike to the traditional way of how they shape Banh Mi in Vietnam, which has the best result so far in my oven. But exploration new things is base for innovation, so I am very eager to hear more about your experiments.
I am very learning-by-observing oriented. I wish I could have enthusiast bakers like you as my baking neighbors. 🙂 Then we can run back and forth to each other’s kitchens to practice and share opinion together.
It is honestly, a lot of info to digest. But I love it! Constant learning and sharing is the key to success right? Thank you for choosing me to share those. 🙂
How was the slashing so far? Or you are still experiment on the po-boy smooth tops? With your description and photo, I bet the oven spring this time is fantastic. 🙂
Mark, recently, I am grown into a new baking obsession, French croissant. How harmful could that be? 😉 Are you into this subject too?
Keep each other updated, sure?
Rose,
LikeLike
Hah! Yeah, I know it’s a lot to digest, but I think you appreciate the details. Please let me know if I’m overwhelming you/your blog.
And I do kind of feel like we’re baking neighbors…only separated by 5,000 miles!
My slashing got much better when I put down the lame and just used a single-edged razor; it cut right thru the dough cleanly. For now I’m focusing on the smooth tops, though.
And, yes, I actually made croissants just last week. My favorite magazine and cooking source is Cook’s Illustrated–their recipe and approach is easy, if tedious, and really came out well. I baked up about half for my neighbors (one of whom ate 3 or 4!) and froze the rest of the pre-shaped, unbaked ones for when my teacher wife finishes the school year. Here is the recipe:
http://bit.ly/KT6l5r
-Mark-
LikeLike
Hey Mark,
You are not overwhelming my blog at all. Sometimes when I wrote a post, I was afraid that I was flooding my readers. I hope you don’t mind reading such long posts.
Please feel very free to share to me. I admire your hard work! 🙂 Keep me constantly updated, right, distant baking neighbor?
I just recently post a croissant recipe of mine an a loong story behind it. I would love to hear your opinion on it, if it doesn’t bother you much. 🙂
Thanks a lot for your support,
Rose,
LikeLike
Dear Rose,
Sorry for the late response as i was away. I was so looking forward to your reply and so happy to hear back from you. Thank you sooo much for the wonderful explanation for being so helpful! 🙂 you are great great baker and what makes you even better as a person is the way you share n connect your experiences and advices with people! oh I created steam only by spraying water into the oven – and you are right, I’ll follow your advice and keep you updated on the results. I have to stop baking for a weeks due to my exams. 😦 once done I’ll update you again in June! 🙂 I am sure it will turn out well with your wonderful guidance! It’s really nice to know you Rose! Have an awesome day at Finland!
Thanks again!
SA
LikeLike
Hi SA,
Of course you will hear back from me. 🙂 I make this blog to share and open discussions. Your comment has been an encouragement for me to continue writing. so Thank you!
And you are very welcome. I am just a novice in this great bread baker community and hope to learn more. Thank you again for your kind words.
I hope to hear more from your oven in June when you have more time. Good luck with the exams. Finger crossing, for you.
I wish you well,
Rose,
LikeLike
Amazing bread!!!!!!! wow… I’m speechless…..I’m going to try these!!! ciao…
LikeLike
Thanks Nicoletta! I hope to hear more from your kitchen when you try these out! 🙂
Buona fortuna!
Rose,
LikeLike
Dear Rose,
Thank you so much for sharing your hardwork with us! i really enjoy reading the 2 episodes of Banh mi and with your detail explaination and the wonderful recipe, i did bake some nice loaves out of your recipe, it taste really nice and chewy! The only 2 problems i like to bring out and seek your advice is
1) Crust – my crust was thin, but it wasn’t crispy.
2) Crumbs – they were quite chewy and soft, but then, its not so “airy” and “little” like yours (mine was full of crumbs looking at the cross section) – i remember the banh mi in HCMC had so little crumb, its almost like a hollow baguette and i love it. – Do you know how to achieve that “emptiness” in the baguette? One thing i didn’t follow in your recipe is the leaving the oven doors ajar as well as pour hot water because my oven is so small that i can’t make space to have a tray on the bottom.
Thank you so much for generously sharing your experience!
Thanks
SA
LikeLike
Hi SA,
You are very welcome. 🙂 I am just a enthusiastic novice in the baking communities comparing to all the great out there. Your kind words encourage me a lot. Thank you!
The secret for crispy crust bread is to have sufficient steam in your oven for the first 5 minutes of your baking (in this recipe). I read in your comment that your oven is too small to splash water on the bottom tray. So can I ask you what is your method to create steam in your oven?
This specific kind of bread also desperately needs steam to expand to its maximum volume (to create light and little crumb). However, too long steaming time, or do not let the steam out completely after its prime time (as you said that you did not leave the door ajar to let the steam out) will also not good for your crispy crust.
The insufficient steam creating and releasing both will result in dense and soft crumb bread.
Small oven is an advantage if you look at the bright side. 🙂 Because your steam will be concentrated to such small area. My oven is rather small too, comparing to regular size family oven. It only fit only one 12-cupcake pan at once. My suggestion in your case is that you should create steam in your oven by mist the bread very generously right after slashing and before putting it in your oven, also after mist your oven wall (stay away from the light and fan, if any), close it immediately, make sure that your oven door and air vent are sealed carefully, then after 5 minutes of steaming, you open the door to release the steam, use a wooden spoon to keep the door slightly open for 2 mins, bake the loaves for 8 to 10 more mins.
Let me know how it comes out, will you?
Rose,
LikeLike
Thank you so very much for your extraordinarily detailed instructions. I’ve been struggling with this recipe (or the New Orleans po-boy loaf, which is similar) for several years with varying degrees of success and so really appreciate your including all the great details plus the reasoning for your approach. I look forward to trying this recipe tomorrow and will let you know how it goes!
LikeLike
Hi Mark,
You are very welcome. I hope my recipe can help you conquer this Banh Mi challenge. 🙂 Cannot wait for your result feedback tomorrow. Finger crossing!
Feel very free to come back for more discussion, I am eager to hear other’ opinion.
Rose,
LikeLike
Hey, Rose:
Success! I followed your instructions basically to the “t”; the only two hiccups I had were:
1. I used the steam pan method (per Fresh Loaf), which works great except non-stick pans give off fumes above 500°F (260 C), so I’ll need to rethink that.
2. The temperatures and times were too much for my oven, which is usually very accurate, and the loaves were over-browned. I’ll probably just reduce the time next time; as it was, I baked them at 275° C for 6 minutes and then 250° C for 3 minutes and they were too brown.
I really like the lightness achieved–the recipe made 6 loaves, each 6-7″/15-18cm long and about 2.25″/5.7cm in diameter.
I posted some photos here:
http://imageshack.us/photo/my-images/196/photo2sq.jpg/
http://imageshack.us/photo/my-images/163/photo1iqj.jpg/
Also, any thoughts on getting that flaky, crunchy crust that these loaves usually have? When I get them here, the outside almost flakes off when you bite it.
Thanks again–you are great!
-Mark-
LikeLike
Hi Mark,
I am so glad that your Banh Mi came out great. 🙂
I have seen your photos. Great achievement. I hope you are happy with the recipe.
About your 2 hiccups ;):
1) about the steam pan method of the fresh loaf. I have tried that before, good result, but not great. It sometimes does not create enough steam for baking baguette. So I suggest that you can explore other alternatives I posted, or of your own finding, until you feel satisfied. This is definitely very itchy and frustrating topic for home bakers. I heard many forks succeed with Sylvia steam towel system. 🙂
2) About the over browning Banh Mi, there might be a lot of explanations and solutions for that. Here are my 3 theories:
First, I noticed in your photos that the under part of your loaves seems not as brown as the upper part. Which raise my thought that maybe your oven have higher heat from top than from bottom of the oven, if you know what I mean.
Or, it might be caused by the steam pan method, since the pan is on the bottom of the oven, it absorbs some of the heat, results in uneven browning.
Or it might be that the steam method you are using are not effective enough to prevent the early browning of the bread. When I baked my Banh mi using my steam method, during the first 5 minutes of steaming, my loaves does not brown color, almost like at all. They only brown up when I release the steam out of the oven. And after that, they brown up real quick. 🙂
Next time baking, I suggest that you may:
– reduce the heat down to 260 as you suggest.
– lower your baking rack to the lowest.
– try a new steaming system. You know you have it right, when after the steaming time, you open your oven, and the steam comes out like hot blowing winds, almost like in a sauna room.
– After 7 minute or so, if you notice uneven browning of your loaves, take it out, flip it over so that the under part get some heat too. 🙂
And you also ask about the crunchy crust. It is the result of effective steaming. In order to achieve that, you must have a lot of steam during your first 5 minutes of baking, only in that first 5 minutes, however.
After that, you must release all the steam out of the oven, leaving the crust a chance to dry out and crisp up, for instance, get the steam pan out, open the air vent (if any), ajar the oven door a for 2 minutes.
Furthermore, baking time is also important, the crust take time to dry out. In your case, 8 minutes with first 5 steaming, leave only 3 minutes for crust to dry out and it’s not enough.
I hope my explanation and suggestion can be helpful for you. What do you think?
Rose,
LikeLike
That makes sense, Rose–thanks!
1. Steam:
I did get a good amount of steam with the towel method, but not the billowing cloud that you describe. Next time I’ll look at some other options such as the lava rocks. I can’t throw water on my oven floor as you have, as it’s an electric oven–doesn’t seem like a good idea! The loaves were definitely very brown before I opened the door and removed the towel-filled steam pans (after first 6 minutes), so that’s something to work on.
2. Temperatures:
When I’ve had decent success in the past, I baked for about 10 minutes total at 460°F/240°C and they were much lighter in color but still too soft like today’s. So, I’m guessing it is more the steam than the temperature.
LikeLike
Mark,
The steam coming out of your oven sometimes can be invisible due to the little differences in temperature around your oven, e.g. steam is hot, surrounding is hot too, so the steam cannot be seen with bare eyes.
But you should definitely “feel” the blow of hot steam coming of your oven, blast into your skin (if it is near to the oven’s door). 🙂
As I said, steam is fatally important in this kind of bread. Try misting your loaves quite generously before putting them into hot oven, too.
I think you should also prolong your baking time, to at least 12 mins with 7 mins without steam to achieve the crispy crust.
Rose,
LikeLike
Hey, Rose:
I tried again today and it worked out much better with your suggestions:
1. Temperature:
I preheated the oven to 525°F/275°C and then lowered it to 500°F/260°C for the first 5 minutes of steaming. After that I lowered it again to 400°F/205°C and baked for 5 minutes, turned the loaves, and baked for 5 more. So, 5 minutes at 275°C and 10 minutes at 205°C, plus 2 minutes with the oven off and door ajar.
2. Steaming:
I tried something different and used a large disposable roasting tray (see photo below). I preheated it in the oven, sprayed my loaves, and sprayed the roasting tray before placing it upside down over my loaves. It held in the steam and, like you said, they were still pale, yet risen, after 5 minutes of baking. Yay!
I still need to work on my slashing; my lame is a few years old and I don’t think it’s sharp anymore, so I may make one. Also, I lowered the oil/fat and sugar percentages to 3% or 7g each, as the loaves were a little too soft for me. (I based my percentages on actual New Orleans commercial po-boy loaves that I’m trying to get to.)
Practice makes perfect–my wife is happy with me trying every day, if I need to!
-Mark-
http://imageshack.us/photo/my-images/641/photo21rj.jpg/
http://imageshack.us/photo/my-images/690/photo11cf.jpg/
LikeLike
Oh, and I also lowered the rack–you can see that the bottom is much more evenly browned. Yay!
LikeLike
Hi Mark,
I am so glad your Banh Mi today came out great. I see huge development with your loaves in your photo. Congrats! 😀
How about the loaves crust? did it crisp up nicely? I can see in your photo that it should be much better than yesterday’s batch, isn’t it?
The steam system you described is brilliant. I saw almost the same technique in a video on the northwestsourdough.com website, here is the link to it: http://www.youtube.com/watch?v=-4PHUyRmpPc&feature=player_embedded , she is the sourdough goddess to me. 🙂 and she using a roasting pan lid instead of aluminum pan, but I assume create the same result.
About the oil and sugar, you can cut it back to your own preference. Maybe it’s the difference in flour type that that amount of oil can create too much softness to your loaves, and the high sugar content may contribute to the early browning too, so feel very free. 🙂
I do not own a professional slashing lame, either. But I make one myself quite easily with a sharp double razor lame and a wood stick. A dull knife can definitely steal your slashes beauty. 😦
I am very glad to hear great results are coming out of your oven. and yes, practice does make perfect. Keep me posted with future result, ok?
btw, how was the holiday? 🙂
Rose,
LikeLike
Hey, Rose:
Yes, the crust is much better, but it’s still not quite that shattering flakiness that I see on good banh mi loaves. Po-boy buns are similar, but have an even thinner exterior with the same flakiness. I’ve tried spraying water, salt water, cornstarch and water, and oil on the outside to help that over the last few years, but no luck so far.
And, yes! I got the idea for using the disposable roasting pan from both Fresh Loaf and the site you mentioned. It was only $6 (€4.50) and should be durable enough to use for a while.
And by holiday, do you mean May Day? Unfortunately, it’s not celebrated in the States. We have to wait until the last Monday in May for our Memorial Day to get our next day off. 🙂
LikeLike
Hi Mark,
That crusty crispy, almost flaky loaf is an art, and a dream, of course. Those Banh Mi sold in the bakery are made with professional oven with perfect automatic steaming system, so no jealousy.
I have not achieve that level, either. But with the limited resources of home bakers, we should be proud and keep practicing. 🙂
In Finland and in Vietnam, we always have day off on May day, so I just assumed about the States. Sorry about that. 😛
Anyway, good luck to us both with Banh Mi! 🙂 Keep me updated, sure?
Rose,
LikeLike
Hi, Rose:
Just a quick (okay, LONG!) update–I went ahead and purchased a handheld steamer this week; I found it on eBay for only $20/€15. I used it with my disposable roasting pan and it is helping; the crust is getting thinner and crispier and my bake times are extended by the covered pan, so I have better control over the color of the crust. I’m still not getting the glossiness from gelatinization of the crust, but I’m working on it!
To be honest, though, the biggest change for me was letting the loaves rise more, almost to the point of over-rising. I used your recipe today, but made a few changes:
– 5g of instant yeast vs. 3g (almost double)
– mixed in a food processor for 5 minutes instead of stand mixer
– used cold water (4° C) instead of warm, as the food processor really heats up the dough
– let rise in my proofing box (food cooler) with 2 Cups of steaming water for 60 minutes; dough more than doubled
– no slashing–I’m trying to emulate po-boy loaves which have smooth tops
– steamed with overturned pan using hand steamer–30 seconds of steam and covered for 12 minutes at 230°C/450°F, then uncovered for 10 minutes at 205°C/400°F, plus 2 minutes in shut-off oven with door ajar
You can see by the photos that they’ve really grown in size–the biggest were 7″/18cm long, 2.5″/6cm wide, and 1.75″/4.5cm tall. And the biggest surprise? There is very little oven spring–you can see by the photos that they grew very little after baking started.
I also did experiments last week with slashed vs. non-slashed loaves–again, the loaves grew very little in the oven overall and there was almost no difference between the slashed and unslashed in terms of overall size after baking.
Some photos from today:

(I tried 3 different shaping techniques: (from left: Peter Reinhart’s boule/baguette method, a folding/rolling method, your method)
And my wife is enjoying all the experiments–we’ve had lots of sandwiches and pain perdu/french toast this week!
Regards,
-Mark-
LikeLike
Hi Mark,
Great to hear more from you! How are you these days?
A handheld steamer is a great investment for bread baking. 🙂 It open up a whole new horizon to improve your bread quality. so congrats!
About the glossy crust, I haven’t about to achieve that stably either. The best chance I’ve ever had close the that is when I mist the slashed loaves very generously right before putting it into the oven. I also try misting it a bit after they are shaped, before final proofing them in order to create those smooth, kind of shiny skins outside of the loaves.
According to your photo, I notice some problem with the proofing. Your loaves appear to be over-proofed. Maybe it is because of the increasing yeast amount, or because of longer proofing time. I have read that over-proofing doesn’t really help in increasing your loaves volume, but have negative affect on it. 😦 You can read about it more here: http://forums.egullet.org/index.php?/topic/82234-demo-proving-bread/.So I really think that you should reduce the proofing next time. Double in volume may not necessarily mean double in diameter, I think.
Here is a Po-Boy recipe from a famous blogger on the thefreshloaf that I have just checked out: http://www.thefreshloaf.com/node/24960/new-orleans-poboy-bread-it039s-all-eric039s-fault . It uses 10% of rice flour in the recipe and claims to have crispy crust and velvety crumb. I will try this recipe very soon and let you know how this come out. 🙂
About to slash or not to slash, I still do believe that slashing helps the bread to rise better, hence, bigger volume because then the initial heat kind of harden up to cover, the dough will then rise through the weak spots – aka the slashes, theoretically. My loaves in the past had the same symptoms too, but as my scoring skill improve + the margarine piping technique that I mentioned, it has gotten better. But most of the po-boy recipe do not require slashing, so I am not so sure anymore. Humm, I will have to try this Po-boy recipe. 🙂
Some months ago when I was experimenting with this Banh Mi recipe, my boyfriend had a lot of sandwiches, too and he was so happy. I think so is your wife. 🙂
Keep each other updated, ok?
Rose,
LikeLike
Hey, Rose:
Thanks for the links–I’m very familiar with that Fresh Loaf thread and the recipe used; if you scroll down that page I’ve posted as mrmambo (and there are some other threads from me on there trying to make this bread). The problem with that recipe is the density–it’s producing the equivalent of 4 oz./115g loaves of 6″/15cm length. This is literally twice what real po-boy loaves weigh in New Orleans; it’s tasty, but simply way too dense, heavy, and caloric (almost 300 calories vs. 160).
And looking at that other thread about overproofing–I’ve usually judged my final rise by if the dough starts to collapse when you poke it (your test) or slash it. I didn’t slash these like that author did, which is probably what caused his to collapse, as I wanted a smooth top. Plus, when sliced the loaves from today look fine.
Take a look at this photo of a banh mi loaf I bought in Atlanta on Sunday–it weighed even less than my target and was only about 50g after baking for a 15cm loaf. Plus, it was almost 6.5cm tall! It was huge:

Here is the “real” stuff from New Orleans; Leidenheimer’s Bakery there has been making them for about 100 years and is considered the standard. All the restaurants use their loaves:

http://imageshack.us/photo/my-images/828/leidenheimerloaf.jpg/
You can see the flakiness of the crust and the very soft interior. I’ll keep working on it!
-Mark-
LikeLike
Mark,
Thanks for the quick reply. If it is not any sooner, I would have tried the recipe. So, maybe I backed out from that idea.
About the over proofing matter, I think that it still affect the oven spring very much. Oven spring is the result of the final bursting action of the yeast. There is an optimum time to put your loaves in the oven. The yeast needs to be in its most active stage to get oven spring. It has to be on the up swing. If you let your dough sit and rise, you will see it rise vigorously to a point and then the rising slows. The activity of the yeast will increase to a point and then become less active. To get oven spring you need to bake your loaf when the yeast is on the up swing.
Your loaves may not appear to be collapsed but the very active yeast activity inside has happened too much too long during the proofing time, leaving no food left and the yeast bacteria may have died and past its most effective prime before you put your loaves into the oven for oven spring. 🙂
And those authetic po-boy from New Orlean is amazing. I will work in order to achieve that definitely.
Rose,
LikeLike
It’s still a very tasty loaf, if not authentic, so you may enjoy it!
Thanks again for the article on proofing; it’s very informative. I have tried some overnight ferments for po-boy loaves, where I did the bulk rise in the fridge and then punched down, shaped, and proofed at room temperature the next day. I did get a very nice rise, but a slightly reddish crust, as the author mentions in that article. It may be time to revisit that…maybe tonight! 🙂
I do overnight/multiday ferments weekly when I make pizza dough; I often leave it for 3 to 5 days in the fridge and it develops wonderful flavor. I’ve baked pain ancienne with great success and really love both Peter Reinhart’s baking books and Cook’s Illustrated–both are reliable and well-tested sources.
Good luck to you, too!
-Mark-
LikeLike
I have made banh mi with rice flour before and it has turned out dense and gummy. Thank you very much for this explanation!
LikeLike
You are welcome. I hope this recipe will be your favorite Banh Mi’s. 🙂
LikeLike