Ice cream Diary – Log 1 – 17.05.2012
Summer is coming to Finland finally, after the last 6 months of cold and snow.
I remembered last summer; it was so hot that I constantly craved for something cold to chill out the heat. Is there anything more satisfactory in a hot summer day than ice cream? I don’t think so. The odd was we don’t want to buy store-selling ice cream here in Finland; they are insanely expensive, 5 euros for 1 box of good ice cream, 2 euros for a scoop. You have got to be kidding me! We did not want to buy an ice-cream maker either for the same reason, too expensive, 50 euros for one, plus 25 euros for extra bowl. Wow, that amount of money for only 3-month use in the summer? We won’t let you fool us, Mister!
But the heat wouldn’t go down. I had to found away to make ice cream myself, without a machine. So my ultimate mission for last summer was to find a way, to make ice cream at home, without a maker, with the quality of a premium store-bought ice cream.
In this post I would like to describe these 4 popular homemade, without a machine, ice cream making methods:
- The Stirring every 30 Minutes Method by David Lebovitz
- The Ice tray + Processor Method by The Food Lab
- The Whipped Cream + Condensed Milk Method by Kevin and Amanda
- The Whole Egg Method by Natasha Zabolsky
There are 2 more methods that are also discussed widely on the Internet, which I decide not to try and why:
- The Ice + Salt Shaking in a Bag method, here. I don’t want to try this because although this is simple, but very messy. Technically, you fill a large plastic bag with ice and salt, and then put a smaller bag inside with a cup of prepared ice cream mix. After some agitation, the mix in the inner bag will get cold enough and the mix inside will start to freeze. This method very likely leads to leakage — you often end up with salty brine all over the kitchen countertop, or even in the ice cream itself. All the mess is for such small amount of ice cream (1 cup each time). I don’t think it’s worth it that much. 😦
- The Liquid Nitrogen Method, here. Well, I would really like to try this method, only if I have liquid nitrogen in hands. 😦
By going through the 4 methods above, I will analyze their strengths and weaknesses as well as how the result comes out. I will use the very basic ice cream flavor for this experiment: Vanilla Ice cream.
Let see how this turn out.
So excited. I’m gonna have 4 bowl of ice-cream to eat. YAY! Well, this post is such a lame excuse to make that much ice cream at once. :”> But I cannot help it, these methods really trigger my curiosity and crave for ice cream, and the research outcome could be helpful, too. 1 arrow for many birds! 😉
Update: Here is the Link to my own Ice Cream making Method.
——————————————-
(All the instructions are cited from original works of authors listed above, I have no contribution or changes made to these recipes and methods. I quoted all their instructions here for timesaving purposes, no paradigm intended. All the pictures taken, however, are mine, and copyrighted)
——————————————-
Method 1: Stirring every 30 minutes
Ingredients
- ½ cup (125ml) whole milk
- A pinch of salt
- 3/8 cup (75g) sugar
- ½ vanilla bean, split lengthwise (I don’t have beans in hands, so I leave it out)
- 1 cups (500ml) heavy cream
- 2 large egg yolks
- 1/2 tsp. pure vanilla extract
Kindly follow the instruction on the video here. From 0:30 to 5:50. Enjoy!
Step 1: Heat the milk, salt, and sugar in a saucepan. Scrape the seeds from the vanilla bean into the milk with a paring knife, and then add the bean pod to the milk. Cover, remove from heat, and infuse for one hour.
Step 2: To make the ice cream, set up an ice bath by placing a 2-quart (2l) bowl in a larger bowl partially filled with ice and water. Set a strainer over the top of the smaller bowl and pour the cream into the bowl.
Step 3: In a separate bowl, stir together the egg yolks. Rewarm the milk then gradually pour some of the milk into the yolks, whisking constantly as you pour. Scrape the warmed yolks and milk back into the saucepan.
Step 4: Cook over low heat, stirring constantly and scraping the bottom with a heat-resistant spatula, until the custard thickens enough to coat the spatula.
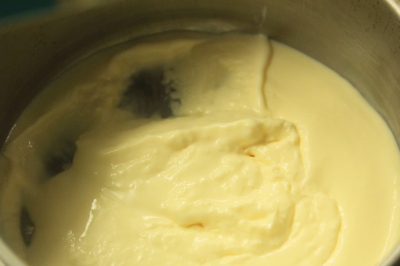
Step 5: Strain the custard into the heavy cream. Stir over the ice until cool, add the vanilla extract, and then refrigerate to chill thoroughly.
Preferably overnight.
Method Procedure
Step 6: Put a deep baking dish, or bowl made of plastic, stainless steel or something durable in the freezer, and pour your custard mixture into it.
After forty-five minutes, open the door and check it. As it starts to freeze near the edges.
Remove it from the freezer and stir it vigorously with a spatula or whisk. Really beat it up and break up any frozen sections. Return to freezer.
Continue to check the mixture every 30 minutes, stirring vigorously as it’s freezing. If you have one, you can use a hand-held mixer for best results, or use a stick-blender or hand-held mixer.
But since we’re going low-tech here, you can also use just a spatula or a sturdy whisk along with some modest physical effort.
Keep checking periodically and stirring while it freezes (by hand or with the electric mixer) until the ice cream is frozen. It will likely take 2-3 hours to be ready.
Pros and cons of this method
PROS
- Easy to follow – What could be so hard with opening your freezer every 30 minutes or so, stir everything up so forcefully, and put it back in. 🙂
- Basic utensils – No special equipment needed, only a hand-held mixer or a folk, a freezer, and a baking dish, and you are good to go.
- Great taste – The ice cream is made with French custard base; therefore its taste is super duper luxurious and complex. I love ice cream make with custard base. Egg yolks are natural emulsifiers, and the resulting custard makes an ice cream that is remarkably smooth and rich. Yummy!
- Low overrun – Premium ice creams have a low “overrun”–that is, the volume of air added to the mix. That’s why the cartons feel so heavy, because the ice cream is very dense. This method does not introduce lots of air into the ice cream mixture, therefore, the taste is richer and the ice cream will melt slower in your mouth.
CONS
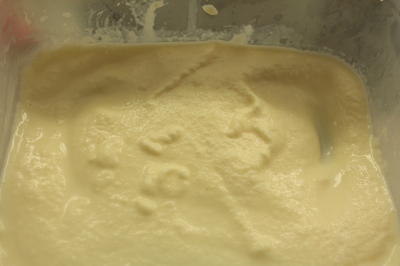
- Not very creamy ice cream result – As you can see in the picture, here when I freeze the ice cream over night in my home freezer. It is rock hard and un-scoop-able. The ice crystals are quite big, which make the taste a bit sandy, and a bit less enjoyable.
- Time, Attention, and Effort consuming – it took me 2 hours unable to do anything to follow this method with 30-minute interval running back and forth to my freezer to stir my ice cream forcefully. Not a good method for a lazy gal like me!
- Egg whites leftover – This recipe only use egg yolk in their ingredients. How about egg whites? In this post, I only make a very small batch for experiment purpose, and I already have 2 egg whites left. It is not an unusual complaint of homemade ice cream addict: “What I should do with all the white?!?!”
Secrets of this method
- Constantly stirring every 45 minutes will resemble the churning procedure of the ice cream machine.
——————————————-
Method 2: The Ice tray + Processor Combo
(Read more about this method here in this article)
Ingredients
- 4 large egg yolks
- ½ cup sugar
- 1 teaspoons vanilla extract
- 1/8 teaspoon kosher salt
- ½ of 12-ounce can evaporated milk
- 2 cups heavy cream
Step 1: Creating of the egg custard – This step has many similarities with David’s, so I won’t repeat the same process all over again. Please look back at the video and follow the procedure below!
In large bowl or stand mixer fitted with whisk attachment, whisk egg yolks, sugar, vanilla, and salt until pale yellow and mixture falls off of whisk in thick ribbons, about 5 minutes. Set aside. Stirring constantly, heat evaporated milk in medium saucepan on stovetop until it comes to a simmer. Slowly add hot milk to egg mixture, whisking constantly, until fully incorporated. Transfer mixture back to saucepan and heat, and whisking constantly, to 180°F (it should become thick and custardy). Do not overheat, or eggs will scramble. Chill mixture completely.
Method Procedure
Step 2: Whip ½ cup heavy cream with whisk or in stand mixer until doubled in volume.
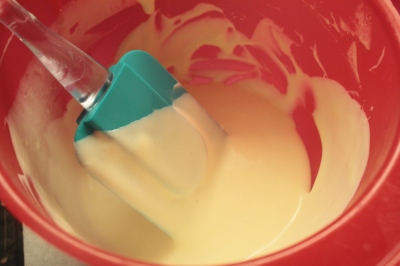
Add whipped cream to egg mixture and fold with whisk just until no lumps remain.
Pour mixture into ice cube trays and freeze for 4 hours, or until solid.
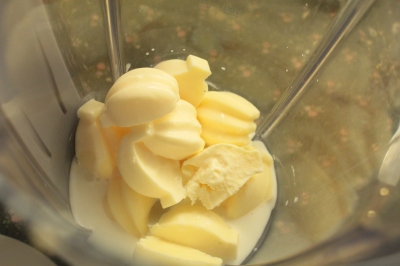
Step 3: Combine frozen cubes of ice cream (use a spoon or a dull knife to remove them) and remaining heavy cream in food processor and process until smooth, about 30 seconds, scraping down sides and breaking up lumps as necessary during process.
Transfer mixture to quart container, and freeze for at least 4 more hours before serving.
Pros and cons of this method
PROS
- Easy to follow – This method is also very easy to apply.
- Great taste – The ice cream is also made with French custard base; therefore its taste is super duper luxurious and complex. Again, I love, not like, love ice cream make with custard base. Imagine as you put a spoon of this heavenly ice cream in your mouth, it starts to melt into the rich, velvety custard cover your tongue.
- Low overrun – This method also create low overrun premium ice cream quality.
- Creamy texture – The ice cream is very smooth, leave no grainy, broken-glass after taste on the tongue. 🙂 Only the best!
CONS
- More utensils needed – Like ice trays and food processor. But good thing is that those are almost basic to a kitchen, so not causing too much problem like finding liquid nitrogen.
- Egg whites leftover – Again, What I should do with all these whites?!?! ARGH!
Secrets of this method
- Use evaporated milk in place of the regular milk. This reduces the water content, thereby increasing the proportion of fat and protein. And one fact: pure fat doesn’t freeze at all. Checked by one time accidentally put a canola oil bottle into the freezer. 😦
- Speeding up the freezing rate by using ice cube tray to freeze the ice cream base help minimize crystal formation.
- Process the ice cream cubes in the processor helps, one more time, to destroy any ice crystal formed in the freezer. By doing this, ice crystal formation went down to virtually zero. Amazing!
——————————————-
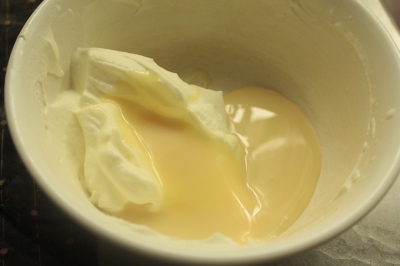
Method 3: The Whipped Cream + Condensed Milk Combo
Ingredients
- 2 cups of heavy cream
- 1 can of Eagle Brand Sweetened Condensed Milk (14 oz.)
Method Procedure
Step1: Whip the heavy cream to stiff peaks
Step 2: Add your flavors, toppings, and mix-ins to the sweetened condensed milk.
Step 3: Fold in the whipped cream into the condensed milk mix.
Step 4: Put it in a container. And that’s it. Freeze and enjoy!
Pros and cons of this method
PROS
- Easy to follow – This method super duper easy to follow, only 4 steps!
- Few ingredients – Wow, look at those, only 2 ingredients for the very basic of ice cream. Can you believe that?
- Not time consuming – This method is very fast to perform. Just 5 minutes to whip cream up, 2 minutes making and folding the condensed milk mix, 2 more hours of freezing, and you have it. No fuss!
- Basic utensils – No special equipment needed, only a hand-held mixer, a spatula, and a freezer, of course.
- Creamy texture – The ice cream is very smooth to the taste. No grainy texture, everything is smoothhhhhhh!
- No egg ice cream – This recipe and method require no eggs; therefore, those with allergy or a vegetarian can simply enjoy these goodies.
CONS
- Light/delicate taste –This is ice cream making style called Philadelphia (also called “New York” or “American”). Unlike Ice cream made by the French custard based style, this ice cream contains no egg yolks and does not require cooking. It’s based purely on cream and sugar, and is very delicate-tasting, with few ingredients. Many of you may not see this as a con. But I do, really do, this do taste almost like frozen mousse! I love the creamy and luxurious ice cream, the sinful sweet that is so rich and intense in taste, which you know when you take it, you may seriously harm your body’s perfect abs, but cannot resist this magnetism. Well, I am not sadistic, but egg-based ice cream is simply just that good! I love Kenji of the Food Lab’s comment: “When I say ice cream, I mean the real deal: Ice cream that’s rich, smooth and creamy on the spoon. Ice cream that melts slowly into luscious, tongue-coating custard. The kind of badass ice cream that makes lesser people feels guilty for eating it. The kind of ice cream worth getting out of bed in the middle of the night for.” Wow! The condensed milk added quite a flavor to the ice cream, very milky and buttery.
- High Overrun – This ice cream is made of whipped cream, which increases 3 times in volume by whipping air into the mixture. And the creaminess of this ice cream is also achieve by that large amount of air presenting, it makes the water cells unable to connect with each other, resulting in creamy ice cream. I personally have no problem if my ice cream is a bit less dense; it is also good for my belly fitness. But as I said at the beginning, I will only stop until I achieve premium quality ice cream. So, sadly, this is a con for this method.
Secret of this method
- Whipped cream introduce a lot of air into the ice cream mixture, make it fluffy and airy, creating the distance between water cells, preventing crystallization.
- The use of condensed milk as sweetener. Liquid sweetener like honey, or corn syrup helps prevent ice to form in your ice cream.
——————————————-
Method 2: The Whole Egg Ice cream
Ingredients
- 2 eggs, separated
- 2oz/60g caster sugar
- 10floz/300ml double cream
- 1-2 tsp vanilla extract
Method Procedure
Well, I don’t make any ice cream out of this method. No picture, sorry. I do want to try this, but to be honest, I am afraid of raw eggs! I cannot overcome that fear, so sorry, guys. >.<
Step1: Beat the egg whites until stiff, and then beat in the sugar a spoonful at a time until the mixture is stiff and glossy.
Step 2: In a separate bowl, beat the cream until pillowy but not stiff.
Step 3: Mix the egg yolks and vanilla extract.
Step 4: With a spatula, gently fold the whipped cream into the meringue. When it is almost incorporated, gradually fold in the egg yolks a spoonful at a time.
Step 5: Pour the ice cream into a plastic freezer-proof container and freeze for at least 6 hours, until solid. If you use a very large box, so the mixture is no more than an inch/3cm deep, then you should be able to eat it 3 hours later.
However, I do gather enough information in the article to do the analysis below.
Pros and cons of this method
PROS
- Easy to follow – This method is easy with not a lot of steps.
- Basic utensils – No special equipment needed, only a hand-held mixer, a spatula, and a freezer, of course.
- Creamy texture – The ice cream is claimed to be creamy, no rock-hard, and no gritty with ice. Smoothly melted in your mouth, guaranteed.
- Using whole eggs – When I came across this recipe. You don’t know how happy I was. Finally, there is NO leftover egg white after ice cream!
CONS
- Raw eggs – Make the ice cream unsuitable for long storage and for the pregnant or infirm. There is a very dangerous bacterium that might exist in raw eggs, salmonella. They are claimed to be extremely rare these days, thanks to industrialized production. But ultimately, it is wise for people who are very old, pregnant to avoid consuming raw eggs. For normal people like me, eating raw eggs is like drawing the 1 in 20,000 lottery card. And I must say, not everyone, particularly me, is lucky with lottery. I have lived 21 years without winning anything from a lottery, scratch cards, drawing, not even a bag of snacks (which my aunt open 3 snack bags and wined 3 extra bags, btw). So, I am willing to save myself from a bit of worry. 🙂
- High Overrun – This ice cream is made of beaten egg whites, which increases 8 times in volume by air cooperated into the mixture, which even worse than heavy cream. So, sadly, once again, this is a con for this method.
Secret of this method
- Beaten egg whites also introduce a lot of air into the ice cream mixture, make it fluffy and airy, creating the distance between water cells, preventing crystallization.
——————————————-
So, I have done the first 3 methods. None of which is 100% perfect for me, however.
Each all has pros and cons. Summary as:
- All could be used to replace the ice cream maker. All are made with basic kitchen utensils.
- Method 1: dense, great flavor -but- grainy, icy texture, time consuming, egg whites leftover
- Method 2: dense, great flavor, creamy texture -but- egg white leftover
- Method 3: creamy texture, easy to make -but- light taste, high overrun
- Method 4: creamy texture, great flavor, whole eggs -but- raw egg risk, high overrun
Here are the characteristics of my dream ice cream making method:
- No ice cream maker needed, of course.
- Creamy texture, no ice, no crystal, no grain, no rock hard.
- Filthy rich, luxurious tastes – which I assume can only be achieve by French custard base.
- Low overrun, premium quality only.
- No leftover egg whites.
- Easy to follow.
- Simple utensils and ingredients.
- Not very time consuming.
There is one method here that is pretty close to my dream: the ice tray + processor method. I love the taste and the texture of that ice cream. Only obstacle is that I don’t want to have left over egg whites.
You may think, “Wow, those are a lot of criteria, Rose. Just compromise. You cannot have it all. You are being too ambitious.”
But you know what? By experimenting hybrids of these 4 methods, I did find a way to use egg whites in making my ice cream. I have made my ice cream this way all the time last summer. And how were the results? Fabulous, I must say. All the good characteristic of Kenji’s method, plus no egg whites left. Best of YAY!
How great was that?
My homemade ice cream, no ice cream machine needed, has creamy texture, and rich, rich taste. The egg whites did add an amazing delicate feature to my ice cream taste, also. 🙂
Cannot wait to find out?
Stay tuned for my next post please.
Rose,








Thanks for sharing these methods. I have been making ice cream (which is actually just frozen yogurt I think) for a while now. It’s just 2 ingredients (3rd which is honey is optional)- frozen fruits and greek yogurt. The texture as soon as it comes out of the food processor is excellent and really ice cream like. The problem is, I either have to finish the whole batch eating it in one sitting or put it back in the freezer and end up in one huge ice block of fruits and yogurt. Lately, I have been making popsicles out of the leftover. But I would love to be able to store it in the freezer and whip it out and enjoy the ice cream I originally created it for. Do you have any ideas how I can achieve this?
Thanks once again, and I’m sorry for taking up too much space. 🙂
LikeLike
Hi Janis,
Thank you for reading my post. 🙂
Here is my suggest to your case. Beware, it is quite long, too. 🙂 I am not sure if it is a 100% cure for your problem or not, but I hope this will somehow open a new point of view. As far as my knowledge, definition of a creamy ice cream is no or minimal ice crystal formation in your final product. This can be achieve by:
1) (Of course is) The minimal formation of ice crystal at the very first steps of making ice cream. As I noticed in your comment, you don’t use any kind of churning method in your ice cream/ frozen yogurt. except for the first step of puree the frozen fruit into the yogurt. This is, of course, will affect your result very badly. Churning (meaning continuously keeping the ice from forming until the firm ice cream consistency is reached) is fatally important in making ice cream. I suggest you try stirring your ice cream a couple of times at 45 minute interval for 2 to 3 hours in the freezer until it reach the firm ice cream consistency(Method 1). Or trying method 2 in my post.
2) Using of rich, high fat – low water ratio ingredients such as heavy cream, evaporated milk, and egg custard. In your case, I suspect that Greek yogurt is not as high fat and rather high in water %, resulted in a block of ice when being frozen in the freezer. My suggestion is that you should try using either other higher fat% ingredients, or making ice cream on a custard base because egg yolk has natural emulsifier that can prevent ice crystal formation.
Or you can try squeezing water out of the yogurt by pouring the yogurt onto a cheese cloth over a strainer, under a bowl, and let it sit for at least 2 hours, after that you will see the yogurt will get quite thicker as an amount of water dropped in the bowl below.
Using of liquid sweetener such as honey, corn syrup, or condensed milk can impressively improve your ice cream texture. And ddding a tbsp. of alcohol such as 40% vodka, rum, sherry or brandy into your ice cream mix will also help preventing the ice formation, since alcohol doesn’t freeze. 🙂
3) Amount of air whipped into your ice cream base. You can notice that ice cream bought in the store always lighter than it looks (I mean its volume). This is because the manufacturers always try to introduce an legal amount of air into the ice cream. These tiny air bubbles will keep the water molecules away from each other, also prevent ice formation. How about whipped an amount of heavy whipping cream in to your frozen yogurt mixture before freezing it?
4) The ice cream freezing temperature must be around -13 degree C, while our home freezers usually set at about -20 degree C for other food such as chicken or fish to safely stay in. Please check your freezer temperature to see if this is true. 🙂 However, if it is the case, do low it down, or you will risk the life of everything else in there. My suggestion is that you should put your ice cream box out of the freezer, into the fridge, for about 20 minutes before consuming it. It will help soften the ice cream a bit to edible consistency.
I have another post about my own method of making ice cream here, https://simplyafoodblog.wordpress.com/2012/05/18/my-ice-cream-story-part-2-my-method-to-make-ice-cream-at-home-without-an-ice-cream-maker-yay/
Kindly read it if you feel interested. I had very creamy ice cream last summer using this method. If you want frozen yogurt, not egg custard base ice cream like mine, I suggest that you first puree frozen fruit and 2/3 amount of thickened yogurt (as I suggested above), pour them into ice trays and freeze for about 1-2 hours, get them out, process them into the food processor 1 more time with 1/3 left of yogurt, and now, enjoy pouring them into final container, freeze them for later consuming. Remember to soften them in the fridge 20 minutes beforehand.
Wow, that’s a long reply. 🙂 Hope this can help you. And I am looking forward to hear the result from your kitchen.
Rose,
LikeLike
thanks for sharing. I’m a fan of ice cream ,but I don’t have an ice cream maker . Next month , Summer will begin in the U.S so that I will try your recipe .
LikeLike
Hi chi Tran,
Thank you for your kind words. I’m looking forward for feedback when you try this method in your kitchen. 🙂 Keep me updated, OK?
Rose,
LikeLike
very helpful, thank you!
LikeLike
Pingback: My Ice cream Story – Part 2 – My Method to Make Ice cream at Home, Without an Ice Cream Maker – YAY! | Faraway from Home
omg, Rose did you really do that all ??
hardworking and patient I must say 🙂
The methods look good, will surely try one of them…..
LikeLike
Hi Shimmeshine,
Yes, I did all those methods. I am not the one who invented them, though. 🙂
Stay tuned for my method, will be posted tomorrow. Or you can try one of those methods here, also work great.
Rose,
LikeLike
try to get something eggless, I am a Vegan….
LikeLike
I see. Then you can try method 3 in this post. 🙂 It only uses condensed milk and heavy cream, very suitable with your diet.
Rose,
LikeLike
will try soon and let you know the outcome 🙂
LikeLike