Ice cream Diary – Log 2 – 18.05.2012
In my last post about Ice Cream, I have reviewed 4 of the most popular methods of making Ice cream at home kitchen level without the help of an ice cream maker. None of which is 100% perfect for me, however. Each all has pros and cons, described in detail in this post. Here are the characteristics of my dream ice cream making method:
- No ice cream maker needed, of course.
- Creamy texture, no ice, no crystal, no grain, no rock hard.
- Filthy rich, luxurious tastes – which I assume can only be achieve by French custard base.
- Low overrun, premium quality only.
- No leftover egg whites.
- Easy to follow.
- Simple utensils and ingredients.
- Not very time consuming.
There is one method here that is pretty close to my dream: the ice tray + processor method. I love the taste and the texture of that ice cream. Only obstacle is that I don’t want to have left over egg whites.
You may think, “Wow, those are a lot of criteria, Rose. Just compromise. You cannot have it all. You are being too ambitious.”
But you know what? By experimenting hybrids of these 4 methods, I did find a way to use egg whites in making my ice cream. I have made my ice cream this way all the time last summer. And how were the results? Fabulous, I must say. All the good characteristic of Kenji’s method, plus no egg whites left. Best of YAY!
How great was that?
My homemade ice cream, no ice cream machine needed, has creamy texture, and rich, rich taste. The egg whites did add an amazing delicate feature to my ice cream taste, also. 🙂
So here we go, how I have made my ice cream all the time last summer, with great results recognition (by my friends who tried them) :).
I proudly announce that the Ice cream Madness of Summer 2012, officially, begins.
Below is my basic ice cream recipe.
———————————————-
Ingredients
Custard base
- 2 egg yolks
- 1 cup (225ml) whole milk
- ½ cup (112ml) heavy cream
- 1/3 cup condensed milk (or light corn syrup, or honey, or liquid glucose)
Swiss Meringue
- 2 egg whites
- 1/3 cup sugar
- ½ tsp. salt
Add-on Liquid Mix
- ½ cup (112ml) heavy cream
- 1 tbsp. 40% vodka (optional)
- ¼ tsp. salt
———————————————-
Instruction
To make the custard base
Step 1: separate egg yolks and whites in 2 cleaned bowls (the one bigger for whites).
In the yolk bowl, add 1/3 cup of condensed milk. Mix well until combined and the yolk are thick and pale. Let it sit very closely to the stove as we proceed to the next step.
The use of liquid sweetener like condensed milk, honey or corn syrup is one of the keys to achieve creamy texture. If you replace some of your sugar in the recipe with liquid glucose or corn syrup, the texture will be velvety creamy and smooth in your mouth, even when it is re-frozen for later consuming.
Please keep in mind that honey has a special taste that may not be compatible with your other flavors. Light corn syrup and Liquid glucose also have specific taste, although not as distinct as honey, therefore, easier to be creative with flavor.
Condensed milk will give your ice cream a milky, buttery flavor. But in last summer, I used light corn syrup.
Step 2: In a heavy-bottomed 1.5l saucepan, pour into it 1 cup of whole milk (2% fat) and ½ cup of heavy cream, turn the heat to medium high to boil the liquid. It takes approximately 3 minutes with constant stirring.
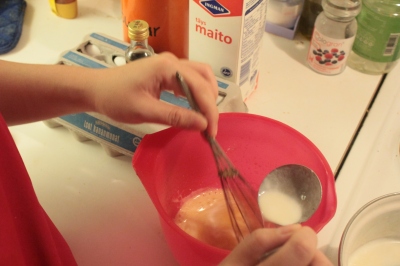
Step 3: As the milk-cream mixture in the pan start boiling; reduce the heat to low. Now using a ladle to carefully and slowly add hot milk to egg mixture, whisking constantly (is not a right word, madly is more correct), until fully incorporated, add about half of the hot milk is enough.
Transfer mixture back to saucepan while remaining the heat at low, and whisk constantly, for about 3 minutes.
You know that your custard is ready when you use your finger to run a line in the back of your custard-covered spoon, if the line stands still, the custard is ready.

How to test if custard is ready (source: http://zoebakes.com)
Warning: Do not overheat the mixture, and when the custard is ready, get them off the heat immediately, or eggs will scramble.
Strain the custard once or twice to get rid of all the lumps if there is.
Step 4: Now you have to cover the custard with plastic wrap, very closely, with the surface touch the wrap, like this.
Now chill mixture completely before putting it into the fridge. Either leave it on the counter for 15 minutes then the fridge, or bath it in ice cold water for faster result.
Put it in the fridge for at least 4 hours, or best overnight (I usually made the custard the night before so that mine are fully ripened), before proceed to the next step. This step is to let the egg custard mixture “mature,” “ripen,” or “age.” Egg yolks contain proteins and natural emulsifiers, which help keep ice crystals small, and the resulting custard makes an ice cream that is remarkably smooth and rich.
As you can see here that after 4 hours chilling in the fridge, the custard will be quite thick once it has chilled.
Watch this video, again for more visible instruction.
Method Procedure
Step 5: After 4 hours, or in the next morning, we will proceed to the egg whites. Set up a double boiler: A heatproof bowl over a saucepan fill with appropriate amount of water that does not touch the bottom of the bowl when boiling.
Turn the heat on high. Let the water boil. When it starts to boil. Pour the egg whites into the heatproof bowl, together with ½ cup sugar and ½ tsp. salt.
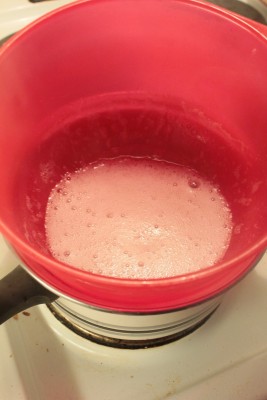
Use a handheld whisk to stir this white mixture frequently, very gently and slowly. After about 5 to 7 minutes, rub the mixture between your 2 fingers, if it is hot to the touch, temperature reaches 60 degree Celsius, the egg whites are now pasteurized and completely safe for consuming. 🙂
Step 6: Now turn off the stove and get the bowl off the heat. Using a stand mixer or an electric handheld mixer with whisk attachments to beat this egg white mixture until stiff peak. I turned the bowl up side down in this picture to show you the stiffness of the egg whites.
Let it cool down completely to room temperature.
Step 7: now fold the beaten egg whites into the custard mixture.
After 2 minutes, you should have a mixture like this.
Step 8: pour/ or scoop the mixture into ice trays. Or in my case, ice pans. 🙂
As explained in the last post of reviewing 4 methods, I choose Kenji’s Ice tray and Processor method as the base to my recipe. Read more about the ice tray power, here.
Let them in the freezer for 2 to 4 hours until completely frozen.
After being frozen, they are as good as they get right now, already. I tried it. It tastes great.You can see the differences in the picture above and below, some pans are missing, LOL, I ate them. Yummy! Lustfully smooth and creamy, but still have high overrun. So next step please!
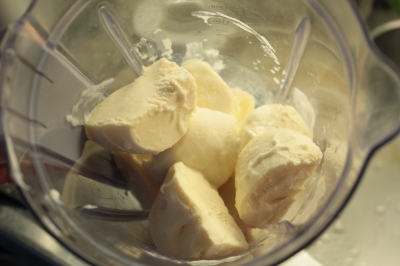
Step 9: Now unmold the frozen cream cubes out of the trays/pans by running the bottom by warm water, into a blender/food processor with S-knife attachment.
Add remaining ½ cup of cold cream (from the fridge), ¼ tsp. salt, 1 tbsp. 40% vodka into the blender/food processor bowl, also.
NOTE: Keep the cream cold, not frozen though, cold. If some of your ingredients have not been cold enough when added to your cream cubes, it will melt the cubes and give chance for large ice crystal to be created.
The reason why I use salt and vodka in this ice cream recipe is that alcohol, or any chemical salt have the affect to lower the freezing point and melt ice, resulting in creamier and less icy texture. Another fun fact: Alcohol doesn’t freeze, either! Vodka is a good choice of alcohol because it is clear and has no taste nor odor so it will not affect the appearance or take away from the taste of the ice cream.
If you make ice cream for kids or alcohol intolerant people, you might want to omit the amount of vodka in this recipe. It will not harm the final product severely; so don’t worry much! 🙂
Now is also time to add flavor to your ice cream. Time to be creative! YAY! Some suggestions are: ripe seasonal fruits and vegetables like berries or rhubarbs, chocolate, and toasted nuts, beans, lavender, green tea, fresh peppermint, or ginger. Trust me, the choices are endless.
- To get the most flavors from a vanilla bean, split it lengthwise with a sharp knife and scrape the seeds, add them into hot milk and let infuse for 10 to 20 minutes.
- Infuse herbs and spices like cinnamon sticks into the mixture, like vanilla beans.
- Extracts, liqueurs, and flavoring oils (citrus, peppermint, cinnamon powder) should be added after the custard has cooled slightly.
- Add perfectly ripe fruits and berries to your ice cream base: sprinkle fruit with sugar and crush it with a potato masher before mixing it in. This adds much more flavor than plain chunks of fruit stirred into the mix.
- To add nuts, chocolate, crumbled cookies, or whole berries, let the ice cream reach the consistency of soft-serve, and then stir in the garnishes; pack in airtight containers and freeze until firm.
(Source: http://allrecipes.com/howto/homemade-ice-cream/)
In this post, I introduce the very basic ice cream, meaning no flavor. So I skipped this test. See you in some other posts with more detail about my variation of ice cream flavors and recipes. 🙂
Step 10: Now process the cream cube mixture with purse function or at high speed until completely smooth, about 1 minute, like this.
Now pour this mixture into a plastic box with cover and freeze immediately. Pack ice cream down firmly and be sure to leave at least 1 cm head space for expansion during hardening process. Place the cover on the plastic container tightly. Do this step as quickly as possible.
It should take about 3 to 4 hours, or best overnight for your ice cream to go into deep freeze.
Now your ice cream is ready to serve. Smooth and creamy, flavorful and dense, plus no more worries about what to do with egg whites leftover, really the best of every world!
One minor problem that might happen in your freezer: after overnight freezing in the home freezer, the ice cream can become rock hard, brick-like, or unable to scoop. Don’t worry, that is totally normal. There might not mean that your ice cream has problems.
It might mostly because our home freezers are designed to keep things like chicken or fish cold and frozen, not ice cream or sorbets, sadly. The best serving temperature for ice cream should be -13 degree Celsius, while your freezer can be as low as -22 degree C (Mine is now) at the moment, have a look.
However, don’t try lowering your freezer temperature. Don’t screw up your freezer to make ice cream softer; you will sacrifice the life of everything else in the freezer. 😦 I’ve found that putting it in the fridge about 10 to 15 minutes ahead of when I want to eat it will bring the ice cream to the perfect consistency.
Done it every time, work like a charm.
———————————————-
Ok, another long post has been composed.
Enjoy, guys. 🙂
And have a nice summer day too.
It is raining here in Finland.
But my heart feel light and happy.
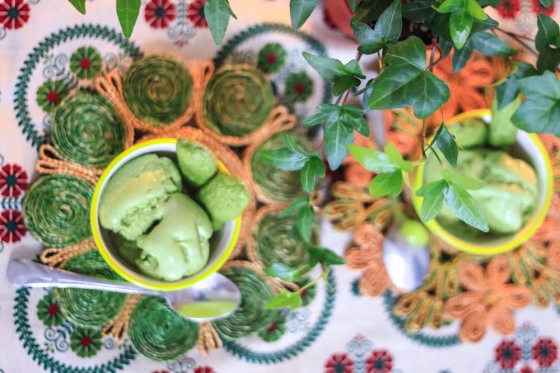
Ah, dreaming about a scoop of Matcha Ice cream again…
Rose,


Lovely! And great photos that makes me hungry. 🙂 Thank you!
LikeLike
Hi Emma,
Thanks so much for your kind words.
Rose,
LikeLike
Pingback: Summer is Finally Here! – My Ice Cream Story – Part 1 – Reviewing of 4 Popular Without-a-Machine Ice Cream Making Methods | Faraway from Home
Excellent!
LikeLike
ah giờ em mới phát hiện chị là người việt lam nhé hihi
LikeLike
Hi Kao,
Uh, chi la ng Viet Nam ma. E cung vay a?
Nhung
LikeLike
dạ đương nhin e là việt-nam-mít chính gốc mới nói tiếng việt sõi thế chứ :)) e vào foodgawker tìm thấy blog c hướng dẫn làm kem,rất chi tiết cụ thể, em cảm ơn c nhìu nhìu nhé 😡
LikeLike
Uh, hihi. Chao e lan nua. E thu phuong phap cua chi co ket qua the nao thi update voi chi hen. Cam on e da ung ho nhiet tinh. 😀
LikeLike
amazing!!! I also love ice tray + proceesor method, but it left too much egg whites, so this method is really the best!
LikeLike
Wow! Thank you so much Rose! I just found your blog trough foodgwaker, and this post of yours if just perfect! Can’t wait to try this method! Thank you once again!
LikeLike
Hi Pami Sami,
Thank you for your kind words. I am glad to be helpful. 🙂
Please do try the method and keep me in touch.
Rose,
LikeLike